What Is the Facebook Pixel And Why You Should Be Using It
Let’s face it – the idea of running a Facebook Ad can be daunting. You could pay $600,000 without seeing any positive results; so the idea of spending money on a campaign, not knowing whether it will provide a ROI, doesn’t sound very pleasing.
Despite this, 92% of marketers claim to use Facebook ads. Based on this, it will come as no surprise that Facebook’s first quarter revenue report for 2019 shows that they received almost $15 billion from ads revenue alone.
But what if there was a tool that could help you measure the effectiveness of your ads, so you know your money is being spent well? It wouldn’t only show your ads to the right audience, but it would also allow you to see what actions people take on your website – such as adding a product to the cart, completing registration, take action on the landing page, so on and so forth.
Enter the Facebook Pixel.
What is a Facebook Pixel?
The Facebook pixel is an analytics tool in the form of a code snippet that allows you to measure the performance of your advertising by understanding the actions people take on your website.
When someone visits your website and performs an action – like adding an item to a shopping cart, or signing up to a newsletter – the pixel triggers and reports back this action. That way, advertisers are able to know when a customer took an action after seeing your Facebook ad.
The pixel also collects data on the users visiting your site from an ad. Meaning that it creates a custom audience based on this data, and as more conversions happen on your site, Facebook optimizes ads to show them to people who are more likely to take action on your website.
Why You Should Use The Pixel?
The Facebook pixel provides advertisers with a wide range of data to improve ad optimization based on accurate measurement of results such as CPA and ROAS. Even if you don’t have ads running right now, it’s always best to implement the Facebook pixel on a business website to start collecting data so you don’t have to start from scratch if you ever decide to run a campaign.
Let’s take a look at some of the benefits of using a pixel.
1. Optimization
The Facebook pixel data provides information of an ad’s conversion rate, not just the click-through rate. This means advertiser’s have a better understanding of their buyer’s journey through the funnel from ad to purchase.
For example, if the audience clicks through an ad but doesn’t purchase anything from the website or doesn’t perform any other desirable action, we know the ad creative is working but the landing page might need tweaking.
2. Retargeting
Advertisers can also set up retargeting campaigns to target users who have visited a website but not converted. For example, someone visited your website and added an item to the shopping cart but never proceeded to checkout, or they added an item to a wishlist. With the Facebook pixel installed you’re able to create a targeted ad of that product to show in that person’s Facebook news feed.
3. Custom audiences
Once your pixel has tracked data for a specific conversion, advertisers can use this data to create a custom audience of people who have similar likes, interests, and demographics and advertise to them.
Which Events Does Pixel Track?
Events are the actions that happen on your website. When someone takes an action on your website, such as adding an item to a wishlist, your pixel logs this information as an “event”.
There are three type of events you can set up on your pixel to capture: standard, custom, and custom conversions.
1. Standard Events
Standard events are predefined by Facebook and can be used to log conversions, optimize for conversions and build audiences. When you set up your pixel, you can simply toggle which standard events you want to capture. Here’s a rundown of standard events:
- Add payment info: The addition of payment information in the checkout flow.
- Add to cart: The addition of items to a shopping cart.
- Add to wishlist: The addition of items to a wishlist.
- Complete registration: The submission of a registration form.
- Contact: A telephone/SMS, email, chat or other type of contact between a customer and your business.
- Customize Product: The customization of products through a configuration tool or other application your business owns.
- Donate: The donation of funds to your organisation or cause.
- Find Location: A web or app search for one of your business locations that suggests intention to visit.
- Initiate checkout: When someone enters the checkout flow.
- Lead: When someone expresses interest in your offering.
- Purchase: Purchases or checkout flow completions (ex: Landing on “Thank You” or confirmation page).
- Schedule: The booking of an appointment to visit one of your locations.
- Search: Searches on your website, app or other property (ex: product searches).
- Start trial: The start of a free trial of a product or service you offer.
- Submit application: A submitted registration form for a product, service or program you offer.
- Subscribe: The start of a paid subscription for a product or service you offer.
- View content: Key page views (ex: product page, landing page, article).
2. Custom Events
Custom events are actions that fall outside those covered by Facebook’s standard events. You can create and use them when you want to track something non-standard like Custom Audiences.
You can add custom events to the website code, just like standard events, but with custom events, they can be named anything other than the standard event names.
3. Custom Conversions
Facebook defines custom conversions as events that “enable you to segment your event information based on values, event types, custom information fields and other characteristics for more detailed reporting in Ads Manager”. You can create a custom conversion by setting rules that define the unique, high-value activities that are important to your business.
Fore more information on Custom Conversions and how to install them, you can visit this section Facebook Blueprint.
How To Create And Install Your Facebook Pixel
Now that we’ve gone over the basics of what the Facebook pixel is and what it can do, let’s go over how you can install it on your website. Keep in mind you need to be able to update your website’s code.
1. Create your pixel
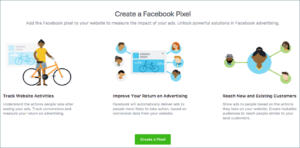
To begin, go to your Ads Manager. From the main menu, in the Measure & Report column, select Pixels below Events Manager.

From there you’ll be taken to a site that provides information on what the pixel offers. Click on Create a Pixel.
Enter the name for your pixel and click Create.
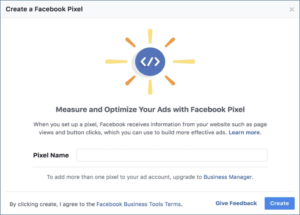
Now you have created your own Facebook pixel and are ready for installation.
2. Installing the pixel
Go back to the Ads Manager, and click on Pixels under Measure & Report on the main menu.
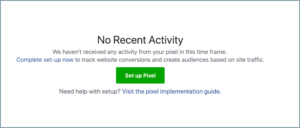
This time you’ll see a new option for setting up the pixel, click the Set Up Pixel button to begin.
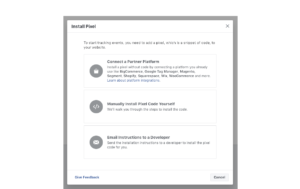
There are 3 options available for installing your pixel. You can either set it up with a partner platform such as Google Tag Manager or Shopify, you can install the code manually, or you can send the instructions to your developer.
3. Installing with a Partner Platform
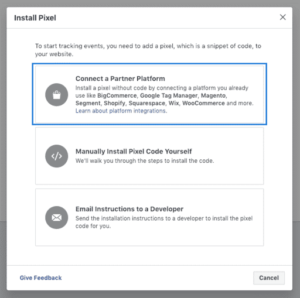
From the Install Pixel menu, choose Connect a Partner Platform and check to see if the platform you are on is already partnered with Facebook integration.
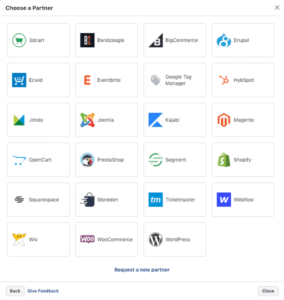
Facebook is partnered with some of the most popular platforms and website services. When you select your platform, you would automatically launch their unique setup process by following the prompts.
If you don’t see the platform you are on, you can also request for Facebook to partner with them if you click Request a new Partner.
With the partner integrations, you have the advantage of installing your pixel without touching your website’s code while being able to automatically capture the actions (mentioned in the previous section) that people take on your website. You can also scale your ads creation and reporting with advanced advertising solutions.
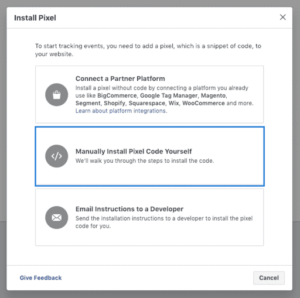
4. Installing Manually
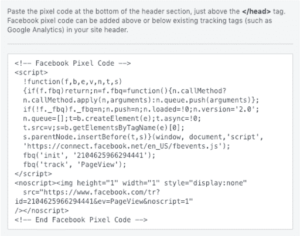
From the Install Pixel menu, choose Manually install the pixel code yourself. Then, go to your website’s code and find the header of your website. Copy the entire code and paste it in the header of your website.
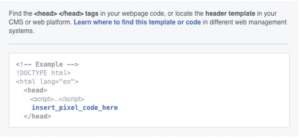
Add the code at the bottom of the header section, just above the closing head tag.
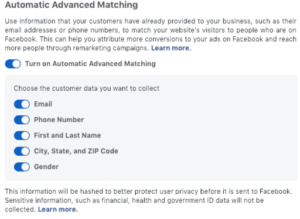
Next, you have the option to enable Automatic Advanced Matching. With this option, Facebook can capture basic information you receive from your website during processes like check-out, account sign-in or registration.
Facebook uses the hashing process to transform information for security reasons. Based on the advanced matching and extra data, Facebook can then use hashed identifiers to better match people who visit your website with people on Facebook, which can lead to more attributed conversions for your Facebook campaigns and a larger size of your custom audiences.
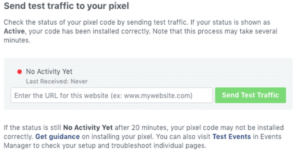
After you place the code on your website, enter your website URL and click Send Test Traffic to make sure your pixel works properly. If your status says “Active”, your base code is installed correctly. When you’re ready to move on, click Continue.
Now you can install the events you want to track. Click Install Events, and toggle the events you’d like to track. You can choose Track Event on Page Load or Track Event on Inline Action.
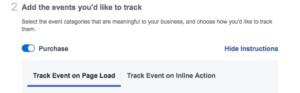
Track Event on Page Load triggers an event when someone lands on a certain webpage, like landing on a Thank You page after filling out a form.
Track Event on Inline only triggers when someone clicks on a call-to-action, like choosing an Add to Wishlist option.
Copy and paste the code for page load events right below the closing header section of the web page. This will usually be just after the opening <body> tag.
For inline action events, place the code between script tags next to the call-to-action you’re tracking.
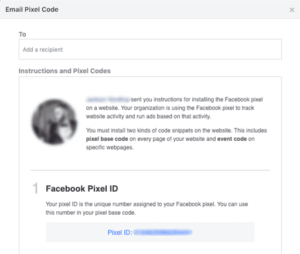
5. Email Instructions to a Developer
If someone else manages the code on your website, you can email them instructions to install the pixel.
From the Install Pixel menu, simply choose Email Instructions to a Developer. Enter the email address of who you’d like to send instructions to.
All the information you see in the Email Pixel Code box will be sent to your developer to guide them through installation. You can edit the form, or you can send it as is.
Facebook Pixel Helper
After you’ve installed the pixel, the next step is to install a Chrome extension called the Facebook Pixel Helper. It’s a troubleshooting tool that helps you check your pixel is live and active.
Once you install the Facebook Pixel Helper, a small icon will appear next to your address bar. When you click on it, the pop-up will show what pixels and events were found on the page and if they have loaded successfully.
To get the extension, visit Google Chrome’s Web Store.
If you need further help troubleshooting your pixel, visit Facebook’s Ad Center Help.
Conclusion
So there you have it. Now that we’ve covered the basics of what the Facebook Pixel is and how you can install it on your website, you can start implementing your own so you can get better insights on your ad performance.